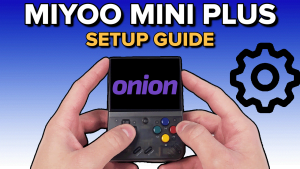
Note: This guide is very old and a lot of things are out of date, but it may help give you a visual idea for some things. A new updated guide will be done when OnionOS officially supports the Miyoo Mini Flip.
Recommended Accessories
- MicroSD Card: 128GB or 256GB (with the platforms this plays, you would be safe with either of these options)
- MicroSD Card Reader: UGREEN SD Card Reader
- Charger: UGREEN 65W Charger (use the USB-A port for charging)
Initial Setup Guide
We’re going to be installed OnionOS as our operating system. If you’re looking to stay with the stock operating system, this guide won’t be for you.
So why OnionOS? Well, it’s the best available operating system for the Miyoo Mini Flip right now, even if it’s not officially supported just yet.
Preparation
Now as always, before we start, you need to have a branded SD card and a branded SD card reader.
Do not use the stock SD card or reader that it came with, throw that out, and yes, that includes the ROM card.
For those confused, they’re unbranded, low quality and prone to failure – both the ROMS and the SD cards.
You can see my recommendations above for what to buy.
Now, the last thing you need is your ROM and BIOS library.
If you just want a big list of games and then you can curate them yourself if you’d like, there’s something called the Tiny Best Set that you can find on Google. Make sure you read the first line so you’re getting the full set, not just the Arcade update.
Read the instructions and grab the version that matches your SD card size and the artwork if you want.
The artwork is optional, as OnionOS has built in scraping now, but it saves a ton of time if you have a large library.
The folders in the zip are all setup to work with OnionOS already, so you can just drag and drop and off you go when we get to that step.
Just in case, here’s a link to what your folder names should be for what OnionOS needs them to be.
Okay, so you have your SD card, SD card reader and your ROMS and BIOS files ready to go.
Let’s move on.
Software
As far as software goes, the only thing we need is Rufus.
Head to the Rufus website, and download the portable Rufus tool.
This is going to help us format our SD card as FAT32 – especially if your card is above 32GB, but just use Rufus to avoid issues.
Formatting your SD card
Connect your SD card to the PC using the SD card reader.
Now let’s format the card as FAT32.
Open up Rufus, and make sure the device listed is the SD card that you connected – should match the drive size.
Now under boot selection, change it to Non bootable.
Then checking near the bottom, you can change the volume label to whatever you want, and make sure file system is FAT32.
Click start – might get warnings about partitions, data etc., just go ahead and yes to all of them to get started.
Should be quick and it’ll format your SD card as FAT32.
One weird thing.
You might get a Windows defender popup about a potential issue with the autorun files – don’t worry, it’s a false positive.
But we don’t need those files anyway, so head into the SD card drive and delete the autorun files that are there.
Installing OnionOS
Okay, the SD card is ready, let’s get our operating system files.
Head to this Github link and download the latest release.
You’ll see it in the latest post, under Assets, it should say Onion-vX.X.X.zip. Download that.
Okay so, grab that zip we just downloaded and extract it.
Copy all of the folders that we just extracted and put them all on the root of the SD card.
Now you can safely eject the SD card.
Pop the SD card into your powered off device, and turn it on.
Let it do its thing for a few minutes until the screen pops up with a thank you message and a heart.
Push A for next a few times until you Exit.
First Start Up
Since we’re here, on the verified screen, let’s go ahead and choose the emulators we’re going to be using so it can add them and create the folders for them for our ROMs.
Easiest way? Push X to select all.
Now use R2 to get to Apps.
I like to install the following: Activity Tracker, Clock, File Explorer, GameSwitcher, Onion OTA Update, Quick Guide, RetroArch, Search, ThemeSwitcher, and Tweaks.
Press Start when done to see a list of what will be installed, then Start again to install.
It’ll reboot and now we can add our games.
Adding ROMs & BIOS
Okay, let’s finally add our ROMs and BIOS files.
Turn off the device and pop out the SD card, and connect it back to your PC.
So this is very easy.
Games go into the Roms folder, which you will see system folders inside – so you would put Game Boy games in GB, Game Boy Advance in GBA and so on.
If you grabbed the Tiny Best Set I talked about earlier, all the folders are already named correctly, so as long as you installed the right emulator with package manager, it’ll show on the device.
So just copy and paste the Tiny Best Set system folders into the Roms folder here.
If you’re not using the Tiny Best Set, add your games to the system folders that you care about.
For a video all about ROMs:
For BIOS, it’s the exact same, copy your BIOS files into the BIOS folder (root of the SD card).
No subfolders.
So, for a PlayStation 1 bios, which is required, you would copy that bin file right into the BIOS folder.
That’s it.
For a video about BIOS files:
And here’s a list of recommended BIOS files.
Refresh Game List
Once you’ve loaded everything up, safely eject your card and pop it right back into the device.
Mine has been pretty good about recognizing everything immediately, but if not, press Select in the Games tab in the main menu to refresh your ROMs.
Artwork
Alright, now let’s get some thumbnails.
First, make sure you’re connected to WiFi by going to Settings > WiFi.
Then, let’s start scraping.
Head into Games, then pick a system and head inside.
Push Y and scroll down to Scraper.
Head to Configuration, then Screenscraper account settings.
If you don’t have one already, go make an account at Screenscraper.fr (free) and then input that username and password here.
You’ll need this or you’ll get limit locked doing scraping without an account.
I would also suggest toggling on Background Scraping.
Scraping takes forever, and you’ll want to do other things while it’s going on.
Click Back to configuration menu, then Back to Main Menu, then just click Scrape all roms.
And so when that’s done, you’ll see thumbnails popup on the right side of your gameslist.
Repeat this process for each platform you have.
Apps
Head to the Apps section.
Package Manager is where you can add/remove emulators and apps – same screen like we did during setup.
Activity Tracker will show you how long you’ve played your games.
RetroArch is where you can do advanced RetroArch setting changes.
Themes is where you can change the system theme if you wanted to.
Tweaks is for system tweaks – one that I like is Appearance, and enabling Show recents to see recent games.
Lastly, Onion OTA update is to update your device – make sure to check this regularly to stay up to date.
Hotkeys
Lastly, you likely want to know your hotkeys so you don’t get stuck in a game.

You can find more here: https://onionui.github.io/docs/apps/shortcuts


