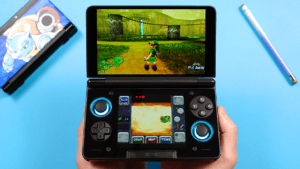
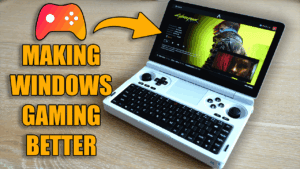
What is Bazzite?
It’s meant to mimic the Steam Deck operating system (both the Game Mode and Desktop Mode) and give you that experience, plus more. You can install it on a ton of different PC’s, x86 handhelds and more – it’s a great option for the ASUS ROG Ally, Lenovo Legion Go, GPD, OneXPlayer and so on.
This guide is meant to help simplify the install process as I found most guides made it super complicated for new users.
Are you going to Dual Boot?
Is your plan to have both Bazzite and Windows installed at the same time?
If so, make sure you setup Windows ahead of time and that’s all working before you start this process.
Pre-setup for Dual Booting – Turn off Fast Startup
For those that plan on dual booting, we have to do a step in Windows first.
In Windows, first, we need to turn off Fast Startup.
Head to Control Panel > Hardware and Sound > Change what the power buttons do > Change settings that are currently unavailable > uncheck Turn on fast startup.
Pre-setup for Dual Booting – Shrinking Windows
Next, we need to shrink our Windows drive so we have space to install Bazzite.
Right click on the Windows icon in your taskbar and select Disk Management.
Find your C drive, right click, Shrink Volume and now you need to enter the amount you want to shrink your drive by (so how big, in MB, do you want Bazzite to be?)
Once done, click Shrink.
Pre-setup for Dual Booting – Turning off Secure Boot
This will vary for every device and motherboard.
Head into the BIOS of your device, and you need to turn off Secure Boot.
Downloading Bazzite
Head to the Bazzite website and click the Download bazzite icon in the top right.
It asks, which hardware are you using? Basically, what device are you installing this to?
So select your hardware, ROG Ally, GPD, whatever it is.
It’ll now ask which desktop environment do you prefer? The answer is KDE.
Then click Download bazzite-deck.
Installing Bazzite
You’re going to need a USB flash drive for this, a 16GB minimum. You can find one here.
Connect it to your PC.
Head over to the Rufus website and download the Portable option.
Open it and make sure the Device listed is your flash drive, then choose SELECT and navigate to the Bazzite ISO that we downloaded and select it.
Go ahead and click START.
You will likely get a popup like this one, just click OK. Then OK to any popups about any other popups.

When that’s done, connect the flash drive to your device and boot into the flash drive.
Typically, this means booting into the BIOS and setting the flash drive as the BOOT drive. This will vary for every device and motherboard.
Configuring the Bazzite installation
Go ahead and select your Language.
Then, you want to head into Installation Destination.
Now, there’s two routes to take – for dual booting and for those that aren’t, so follow the next subheading for what you’ll be doing.
NOT Dual Booting
Under Local Standard Disks, you should see your drive so click it.
Then, keep Automatic selected for Storage Configuration and select Done in the top left.
You may get a popup at this point that says there’s not enough space on your drive, if your drive isn’t empty and you can select Reclaim space and then Delete all and then Reclaim space again.
Dual Booting
Under Local Standard Disks, you should see your drive so click it.
Then, choose Advanced Custom. Then click Done top left.
bazzite-efi
Go ahead and click on free space under Logical View. Then click the Plus icon.
Change the dropdown for GiB to MiB and then enter 300 as the size.
Change Filesystem to EFI System Partition.
Change Label to bazzite-efi.
Change Mountpoint to /boot/efi.
Click OK.
bazzite-boot
Click the Plus icon again.
Enter 2 as the size.
Change Label to bazzite-boot.
Change Mountpoint to /boot.
Click OK.
btrfs
Click the Plus icon again.
Change Filesystem to btrfs.
Click OK.
root
Under Disks on the left, select Btrfs Volumes.
Click the Plus icon.
Change Name to root.
Change Mountpoint to /.
Click OK.
var
Click the Plus icon.
Change Name to var.
Change Mountpoint to /var.
Click OK.
var/home
Click the Plus icon.
Change Name to home.
Change Mountpoint to /var/home.
Click OK.
Click Done top left. Accept changes.
Select Begin Installation bottom right.
Once installation is complete, select Reboot System.
MOK Management
You should boot into a blue screen.
Select Enroll MOK. Then Continue. Then yes.
The password is universalblue.
Select Reboot.
You should load right into Bazzite and you can enjoy!
Restore Secure Boot
To boot back into Windows, you will need to re-enable Secure Boot.
Don’t forget this step – follow the same steps you did to disable it, to enable it.


